Painted Palette Canvas

Painted Palette Canvas

Looking to add a pop of color to your space? Check out this painted palette canvas print! Bursting with vibrant hues, this piece will brighten up any room. Whether you’re a fan of bold primaries or soft pastels, this print has it all. With a mix of shades and tones, it’s like having a whole rainbow at your fingertips. Hang it up in your living room, bedroom, or office for an instant mood lift.

Budget-Friendly Kitchen Upgrades

Kitchen corner Poster

Transforming your kitchen doesn’t have to drain your bank account. With creativity and strategic planning, you can give your kitchen a fresh look and improved functionality without a hefty price tag. Here are some budget-friendly kitchen upgrades to consider.

Paint Your Cabinets

One of the most impactful changes you can make is repainting your cabinets. Choose a color that complements your kitchen’s overall aesthetic, whether classic white, a trendy navy blue, or a cheerful pastel. High-quality paint and a little elbow grease can make your cabinets look brand new without the cost of replacement.

Update Hardware

Replacing cabinet handles, drawer pulls, and hinges can modernize your kitchen. Opt for sleek brushed nickel, matte black, or brass finishes to add a contemporary touch. Hardware upgrades are easy and cost a fraction of a complete renovation.

Revamp the Backsplash

A new backsplash can breathe life into your kitchen. Peel-and-stick tiles are a budget-friendly option that mimics the look of expensive materials like subway tiles or natural stone. These are simple to install and can dramatically transform the space quickly.

Refresh Countertops

If replacing countertops is out of your budget, consider countertop refinishing kits. These kits allow you to mimic the look of granite, marble, or concrete for a fraction of the cost. Another option is to install a butcher block countertop on a small section for added warmth and functionality.

Enhance Lighting

Good lighting can make a world of difference in any kitchen. For a sleek and functional upgrade, replace outdated fixtures with modern pendant lights or install under-cabinet LED strips. Plug-in puck lights are also a temporary, cost-effective solution.

Add Open Shelving

Remove a few cabinet doors to create open shelving. This change can make your kitchen feel more spacious and allow you to display your favorite dishes, glassware, or cookbooks. Paint or line the interior of the cabinets for a polished look.

Upgrade Faucets

A stylish new faucet can serve as a focal point and elevate the overall appearance of your kitchen. Find affordable options with features like pull-down sprayers or touchless operation to combine style with convenience.

Reorganize and Declutter

Sometimes, the best upgrade is simply rethinking your space. Invest in organizers, dividers, and storage bins to declutter countertops and maximize cabinet space. A neat kitchen often feels more extensive and more inviting.

Incorporate Decorative Accents

Small changes like adding a colorful rug, trendy prints, or introducing plants can make your kitchen feel cozier and more personalized. Consider a decorative bowl of fruit or a vase of fresh flowers as a centerpiece for your kitchen island or table.

Upgrade Appliances Gradually

If your appliances are outdated but functional, consider replacing them one at a time as your budget allows. Look for sales or refurbished options to save money while upgrading your kitchen’s functionality and appearance.

You can create a stylish and functional kitchen without overspending by focusing on these budget-friendly upgrades. Remember, small changes can have a significant impact when done thoughtfully.

Creating a Nursery Design Room for New Parents

Nursery Set Poster Bundle in Interior

Designing a nursery for a new baby is an exciting milestone for new parents. This space will be the backdrop for countless cherished memories, from late-night feedings to playful mornings. A well-designed nursery combines functionality, comfort, and style to create a safe and nurturing environment for the baby and the parents. Here’s an easy guide to help new parents design the perfect nursery. 

Choose a Calming Theme and Color Palette

Start by selecting a theme or color scheme that sets the tone for the nursery. Popular themes include animals, celestial designs, or nature-inspired motifs. Neutral tones like beige, soft gray, or white provide a calming atmosphere, while pastel shades of blue, green, or pink can add a gentle vibrancy. Monochromatic palettes accented with pops of color can create a stylish, timeless space for parents who prefer a modern look.

Invest in Essential Furniture

The key pieces of furniture in a nursery are the crib, a changing station, and a comfortable chair. Choose a crib that meets safety standards and has adjustable mattress heights to grow with your baby. A dresser with a changing pad on top can double as a storage and diaper-changing station, saving space and adding convenience. Don’t forget a rocking chair or glider with good back support for those late-night feeds. Add side tables and storage baskets for easy access to essentials like diapers, wipes, and burp cloths.

Optimize the Layout for Functionality

Design the nursery with distinct zones for sleeping, changing, and feeding. For safety, place the crib away from windows and heaters. Keep the changing station stocked and within arm’s reach of a diaper pail. A cozy corner with a chair and a small table creates a practical feeding area. Arranging the room in this way minimizes movement during tasks and enhances the overall flow of the space.

Layer Lighting for Comfort

Lighting is an essential element of nursery design. Install layered lighting with overhead fixtures for general illumination and softer lights like table lamps or wall sconces for a cozy ambiance. A dimmer switch is invaluable for creating a soothing environment during nighttime feedings. Blackout curtains can also help regulate your baby’s sleep by blocking excess sunlight.

Add Storage and Organization

Babies come with a surprising amount of gear, so innovative storage solutions are essential. Use shelves, bins, and baskets to organize toys, clothes, and essentials. Label bins to make it easy to find what you need quickly. A closet organizer can maximize vertical space for everything from newborn onesies to extra diapers.

Personalize with Decor and Accessories

Add personal touches to make the nursery uniquely yours. Hang framed prints or decals that match the theme, or include a growth chart to track milestones. A soft area rug adds warmth and comfort, while a mobile above the crib provides visual stimulation for your baby. Include a bookshelf to encourage an early love for reading.

Ensure Safety and Comfort

Safety should be a top priority. Anchor heavy furniture to the walls, opt for cordless blinds, and keep small items out of reach. Choose materials that are non-toxic and easy to clean. Lastly, a comfortable space for parents should be created with a supportive chair, a throw blanket, and a small sound machine to mask household noise.

In a Nutshell

By blending practicality with thoughtful design, new parents can create a functional and beautiful nursery where their baby can thrive and grow.

Create a Space that Reflects You

Glimpse of memories no. 1

Your home is more than a shelter. It is a sanctuary and an extension of who and what you are. Customizing your home transforms it from a plain living space into a reflection of your personality, tastes, and lifestyle. Whether moving into a new house or revamping your current one, here are some exciting ways to make your home uniquely yours. 

Visualize it

Before starting the actual decorating project, reflect on what you want your home to feel like. Will it be a cozy retreat, a modern minimalistic haven, or an eclectic gallery of your favorite things? Look for inspiration in magazines, online platforms like Pinterest, or even the homes of friends and family. Create a mood board to help define your color schemes, materials, and overall vibe. 

Incorporate Personal Touches

The simplest way to personalize your home is by featuring items that are valuable to you. Display family photos, artwork, or heirlooms passed down through generations. These elements tell your story and evoke a sense of nostalgia and warmth. 

Choose Colors That Speak to You

Colors profoundly affect mood and energy. Selecting hues that resonate with your personality is a simple yet powerful way to personalize your space. Consider vibrant shades like red, orange, or yellow if you are energetic and bold. Choose soothing neutrals, pastels, or deep blues and greens for a more tranquil atmosphere. 

Customize Furniture and Decor

Investing in custom furniture or altering existing pieces can add a unique flair to your home. Reupholster an old armchair with a fabric you adore, or commission a custom-built bookshelf to fit an oddly shaped nook. Add decorative elements like throw pillows, rugs, and curtains that echo your style and enhance the space’s character.

Celebrate Your Interests

Your hobbies and interests should shine through in your home design. Are you an avid reader? Dedicate a wall to bookshelves. Are you a travel enthusiast? Display souvenirs or create a gallery wall of your favorite travel photos. Incorporating these elements personalizes your home and makes it a source of inspiration and joy.

Green Touches with Plants

Adding plants to your home brings life and vibrancy to the space. From small succulents to statement fiddle-leaf figs, plants can reflect your nurturing side while improving air quality. You can also choose planters that match your design aesthetic, further enhancing your home’s personality.

DIY and Handmade Items

Incorporating handmade or DIY elements makes your home even more personal. Craft wall art, sew unique cushion covers, or upcycle thrifted furniture. Not only does this add a sense of achievement, but it also ensures no one else will have the same items in their home.

Lighting Matters

Lighting plays a crucial role in setting the tone of your home. Choose fixtures that align with your style, whether elegant chandeliers, quirky pendant lights, or rustic sconces. Layering different types of lighting, such as ambient, task, and accent, allows you to create a dynamic and adaptable environment.

Evolving with Time

Finally, remember that your home should evolve with you. As your tastes and needs change, allow your space to adapt. Periodically reassess your decor and make updates that align with your current lifestyle.

Great minimalist bedroom design for small rooms

Wedding Portrait canvas

Creating a minimalist bedroom in a small space is not just about design. It’s about achieving a sense of freedom. It combines simplicity with functionality, allowing the room to feel open and clutter-free. The minimalist design emphasizes clean lines, essential furniture, and a neutral color palette, perfect for smaller rooms with premium space. You can make even the tiniest bedroom feel spacious and serene with a few strategic choices.

Start with a Neutral Color Palette

The minimalist design relies heavily on a neutral color palette to create a calm, uncluttered look. Shades of white, beige, light gray, or even soft pastels can make the space appear larger and more open. Choose one or two primary colors and stick with them throughout the room to keep it cohesive. To add warmth, consider layering in subtle earth tones, like tan or taupe, through accessories like pillows, rugs, or wall art.

Invest in Multi-functional Furniture

Furniture serving multiple purposes is a lifesaver in a small bedroom. Opt for a bed with built-in storage drawers underneath or a platform bed with shelves for additional storage. A fold-down desk, floating shelves, or a wall-mounted bedside table can also help save valuable floor space while keeping everything you need within reach. If possible, keep the number of furniture pieces to a minimum—each item should have a purpose.

Keep Surfaces Clutter-Free

One of the hallmarks of minimalism is clean, uncluttered surfaces. Make sure your nightstands and dresser tops aren’t crowded with objects. Instead, limit it to just one or two essential items, like a reading lamp, alarm clock, or a small plant. For personal items and necessities, consider placing them in organized trays or boxes within drawers. Keeping surfaces clear will make the room feel larger and more inviting.

Maximize Natural Light

Light can make even the smallest rooms feel more expansive. If you have windows, keep window treatments simple and airy to allow as much natural light as possible to flow into the space. Sheer curtains or light blinds in neutral colors work well for this. To further amplify the light, use mirrors to reflect it around the room, creating the illusion of a larger space. A well-placed mirror opposite a window can dramatically enhance the light and openness in the room.

Stick to Simple, Clean Lines

Minimalist design is all about clean, straight lines, so choose furniture with a simple design and avoid overly ornate details. Sleek, low-profile beds, narrow nightstands, and streamlined storage solutions will keep the room from feeling cramped. When possible, select furniture that stands on legs rather than sitting directly on the floor—this will give the illusion of more space by allowing the eye to see the floor underneath.

Use Textures for Added Warmth

While minimalism often leans toward a clean and straightforward look, adding various textures can keep the room from feeling too stark or sterile. A soft, cozy throw blanket, a plush rug, or linen bedding can add subtle dimension without crowding the room. Stick with one or two texture types for balance; too many textures can clash and undermine the minimalist aesthetic.

Limit Your Decorations

When decorating a minimalist bedroom, less is more. Choose a few meaningful pieces of decor to display, such as art, a couple of small plants, or a single decorative object. Avoid too many picture frames, wall hangings, or collectibles, making a small space crowded. Each item should serve a purpose and add value to the room’s overall look.

In a Nutshell

Minimalist bedroom design for small spaces is not just about aesthetics, it’s about creating a peaceful sanctuary. It focuses on simplicity, function, and a calm color palette to maximize space and create an inviting atmosphere. By investing in multi-functional furniture, keeping surfaces clear, and letting in as much light as possible, you can transform a compact bedroom into a tranquil retreat that feels larger than it is. With thoughtful choices and a mindful approach to decor, a small bedroom can become a minimalist sanctuary.

How to Lighten a Dark Room with No Natural Light

Different framed posters for wall decoration of a restaurant interior.

Transforming a dark, lifeless room into a bright, inviting space is not only possible but also surprisingly simple. With the right use of color, lighting, and décor, you can turn even the most light-starved spaces into welcoming havens. Here’s how to effectively lighten a dark room with no natural light and bring a new sense of life and energy into your home.

Choose Light Colors for Walls and Ceilings

The colors you choose for your walls and ceiling have a profound impact on a room’s perceived brightness. Light colors, especially whites and creams, are reflective and help bounce any available light around the space, making it feel more open and airy. But if an all-white room isn’t your style, don’t worry. Light pastels or soft neutrals like pale gray, blush pink, or mint green can also brighten the area without overwhelming it, giving you plenty of options to play with.

Use Mirrors Strategically

Mirrors can work wonders in dark spaces by reflecting artificial light, creating the illusion of depth, and making a room appear larger and brighter. To maximize their effect, place mirrors opposite light sources or on walls adjacent to lighting fixtures. For a more dramatic touch, consider using a large statement mirror or a gallery wall of smaller mirrors. Mirrored furniture, like coffee tables or side tables, can also help distribute light more evenly in a room.

Layer Different Light Sources

Relying on a single overhead light often creates a flat, dull atmosphere. Instead, enlighten your space by layering multiple light sources to create depth and distribute brightness. Start with ambient lighting (like recessed or ceiling fixtures), then add task lighting for specific activities, such as reading or working. Finally, add accent lighting, like wall sconces, floor lamps, or table lamps, to add warmth and character. Use LED bulbs that emit a warm or neutral white color, as overly cool tones can make a space feel harsh and clinical.

Opt for Light-Colored Furniture and Décor

Dark furniture absorbs light, making a room feel even more closed-in. Select furniture in light, airy colors like white, beige, or light gray to counteract this. If you own dark furniture, consider adding light-colored throws or slipcovers to brighten it up. Light-colored rugs are also a good addition, especially in darker flooring spaces. For an extra boost, incorporate metallic or glass accents, such as a mirrored tray, a glass vase, or a metallic lamp, as these materials reflect light and add brightness to the room.

Incorporate Reflective Surfaces

In addition to mirrors, other reflective surfaces like glass, metallic finishes, and high-gloss ceramics can enhance the brightness of a room. A glass coffee table, metallic picture frames, or glossy decorative vases can capture and bounce light around. Even a subtle metallic wallpaper or backsplash can add a reflective quality that brings more light into the space.

Use Transparent or Open Shelving

Heavy, dark bookshelves or closed cabinets can make a room crowded and shadowed. Instead, choose open shelving, glass-front cabinets, or transparent furniture to maintain a sense of openness. Open shelving allows light to move more freely and lets you style the space with light-colored books, plants, or decor that brightens up the room. It also creates a sense of spaciousness and can make a room feel larger. Avoid clutter; too many objects can make a dark space feel even more cramped.

Add Greenery or Artwork to Lift the Atmosphere

Finally, add elements like indoor plants or colorful artwork to light the room. Even in low light, many indoor plants, such as snake plants, ZZ plants, and pothos, thrive. These plants add a natural touch that can lift the ambiance, while vibrant artwork or colorful prints can provide pops of brightness against neutral walls.

With these steps, you can transform a dark room into a light, welcoming environment that feels as fresh and vibrant as one filled with natural light.

A Warm Welcome: The Resurgence of Warm Colors in Interior Design

Seoul Colored City Map Canvas

Cool greys and crisp blues dominated the interior design scene for a while. But lately, there’s been a shift towards a more inviting atmosphere. Warm colors make a comeback, infusing homes with coziness, sophistication, and personality. This trend isn’t about a single shade; it’s a spectrum of warmth offering a variety of design possibilities.

Earthy Inspiration

Earthy tones, such as beiges, caramels, and rich browns, lead the charge. These grounding colors evoke a sense of comfort and create a natural foundation for a space. Their incredible versatility allows you to build a warm and inviting base, inspiring you to layer in bolder accents or pops of color and unleash your creativity.

Beyond Neutrals

While earthy tones provide a solid base, the comeback of warm colors goes beyond neutrals. We’re seeing a resurgence of richer, more saturated shades. Terracotta, a burnt orange hue, is widespread, adding a touch of earthy elegance. And then, there are the deep, luxurious jewel tones like emerald green and sapphire blue. These colors make a bold statement, offering a sense of luxury and drama that will surely intrigue and excite you.

Bold and Beautiful

Don’t be afraid of bolder hues! Warm reds, from fiery scarlets to sultry burgundies, are back in a big way. These colors add drama and sophistication, perfect for creating an accent wall or incorporating a statement piece of furniture. They also bring a sense of daring and adventure to your space, encouraging you to step out of your comfort zone.

Pops of Playfulness

Warm colors aren’t just about boldness; they can also be playful! Soft pinks, yellows, and lavenders add a touch of whimsy and cheerfulness. These can be used for throw pillows, artwork, or even an accent chair, injecting personality into your space.

Why the Warmth

The reasons behind this trend are multifaceted. After a period of uncertainty, people are craving a sense of comfort and security in their homes. Warm colors naturally evoke these feelings, creating a more inviting and cozy atmosphere. Additionally, warm colors tend to be more stimulating and energetic, reflecting a renewed focus on the joys of life.

Embrace Your Personality

This trend also caters to a desire for personalization. The wide range of warm colors allows you to tailor your space to your unique style. Whether you prefer the earthy sophistication of browns or the playful charm of pastels, there’s a warm hue to reflect your personality and create a space that feels truly your own.

The comeback of warm colors in interior design is more than just aesthetics; it’s about creating a comfortable, inviting space that reflects your personality. So, don’t be afraid to embrace the warmth and create a home that feels like a haven.

A Brief History of Interior Decoration

Kurbits inspired art wall

Interior decorating has a rich history that reflects cultural, technological, and social changes over centuries. From ancient times to modern trends, the evolution of interior decorating has been shaped by diverse influences, including architectural styles, societal norms, and technological advancements. Here’s a brief history of interior decoration and how it is useful today.

The Ancient Time

Throughout history, interior decorating has been integral to creating functional and aesthetically pleasing living spaces. In ancient civilizations like Egypt and Mesopotamia, interior design served practical and symbolic purposes. Palaces and temples were adorned with intricate carvings, colorful murals, and luxurious textiles, showcasing the wealth and power of rulers. These early designs emphasized grandeur and divine connections, setting a precedent for using interior spaces to communicate status and cultural values.

The classical era of Greece and Rome introduced a more structured approach to interior decoration. Architecture and design became intertwined, with columns, frescoes, and mosaics adorning wealthy homes. The emphasis shifted towards balance, proportion, and harmony, influenced by philosophical ideals of beauty and order. Roman villas, for instance, featured elaborate frescoes depicting mythological scenes, creating immersive and inspiring environments.

The Middle Ages

During the Middle Ages in Europe, interior decorating evolved within the context of feudal society and religious beliefs. Castles and monasteries were built for defense and worship, and their interiors reflected hierarchical structures and religious iconography. Decorative elements such as tapestries, carved woodwork, and stained glass windows conveyed religious narratives and provided warmth in often stark stone buildings.

The Renaissance Period

The Renaissance marked a revival of classical ideals and a renewed interest in humanism and artistic expression. Interior decorating in wealthy Renaissance homes showcased opulence through fine art, sculpture, and elaborate furnishings. Rooms were designed to harmonize with the natural world, integrating gardens and courtyards into living spaces. Italian villas epitomized Renaissance ideals with their symmetrical layouts, frescoed ceilings, and carefully curated collections of antiquities.

The Baroque and Rococo Periods

The Baroque and Rococo periods of the 17th and 18th centuries introduced more extravagant and theatrical interior styles. Baroque interiors were characterized by grandeur, dynamic movement, and dramatic contrasts of light and shadow. Palaces and aristocratic homes featured ornate stucco work, gilt mirrors, and sumptuous textiles, emphasizing the power and wealth of their owners. Conversely, Rococo embraced asymmetry, pastel colors, and playful motifs, creating whimsical and intimate spaces for social gatherings and leisure.

The Industrial Revolution

The Industrial Revolution in the 19th century brought significant changes to interior decorating. Technological innovations enabled mass production of furniture and textiles, making stylish decor more accessible to the burgeoning middle class. Victorian interiors were characterized by ornate furnishings, heavy draperies, and eclectic collections of curiosities, reflecting the era’s fascination with exoticism and materialism.

The Modern Times

The 20th century witnessed a revolution in interior design influenced by modernist simplicity, functionality, and innovation principles. Movements like Art Deco, Bauhaus, and Mid-Century Modernism redefined interior decorating, emphasizing clean lines, geometric forms, and new materials like steel and glass. Functionality became paramount, with designs promoting efficiency and practicality in response to changing lifestyles and social norms.

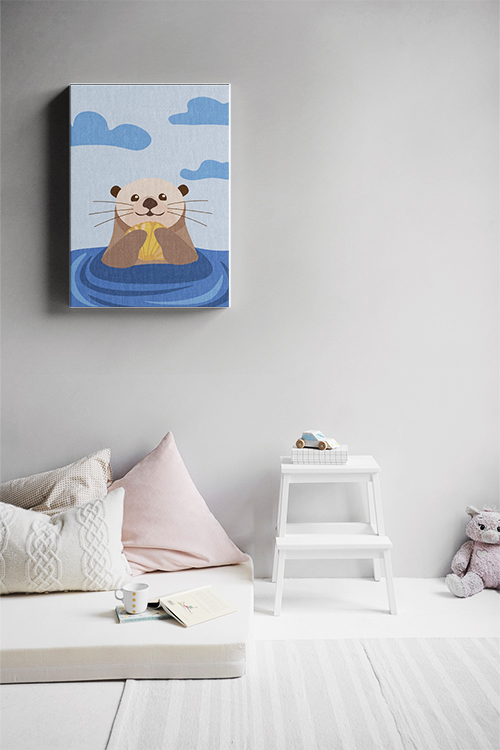
Modern interior decorating continues evolving with a blend of historical influences and contemporary innovations. Eclectic styles mix vintage finds with modern elements, reflecting individual tastes and global influences. Sustainability and technology play increasingly important roles, with eco-friendly materials and smart home devices shaping how homes are designed and decorated.

In conclusion, the history of interior decorating is a testament to human creativity, cultural diversity, and evolving tastes. From ancient civilizations to modern trends, interior design has reflected and shaped our lives, providing functional spaces and expressions of identity, culture, and aspiration within our homes.

What are the Ideal Colors for the Nursery?

Cute Sea Otter Canvas

Choosing nursery colors depends on various factors, such as personal preference, desired atmosphere, and the child’s gender. Here are some things you need to consider when preparing the room or your baby’s arrival:

Soft and Calming Colors

Opt for colors that can create a soothing and relaxing atmosphere. Soft pastel shades like light blue, greens, yellows, or lavenders are not just aesthetically pleasing. They can also positively impact your baby’s mood and sleep patterns. As such, you can be confident that you’re making the right choice for your little one. 

Neutral Colors

Neutral tones like beige, ivory, or soft grays can create a serene and timeless look. They likewise provide a versatile backdrop for various themes or decorations. 

Accent Colors

You can add accents or brighter colors. Examples are coral, mint, and soft peach, which bring vibrancy without overwhelming the space. 

Gender-Neutral Options

If you prefer to avoid traditional pink or blue themes, gender-neutral colors like mint green, lemon yellow, or light gray can be stylish and adaptable.

Check the Lighting

Take into account the natural light in the room. Darker colors make the room look and feel smaller, while lighter colors help brighten the space.

Theme and Decor

If you have a specific theme (like animals, nature, or a favorite storybook), choose colors that complement that theme. 

Longevity

Select colors that will grow with the child. Avoid overly juvenile themes if you plan on keeping the same decor for several years. 

Ultimately, the ideal colors for a nursery create a peaceful and nurturing atmosphere for both the baby and the parents. It is a good idea to test paint samples on the wall to see how they look under different lighting conditions before making a final decision. 

How to Decorate the Nursery Walls

Cute Panda Eating Bamboo Poster

Decorating the walls of a nursery can be a fun and creative process. Here are some ideas to make the nursery walls both beautiful and stimulating for your baby:

  1. Paint and Color Themes

    • Soft Pastels: Light blues, pinks, yellows, and greens create a calm and soothing environment.
    • Accent Wall: Paint one wall in a bold color or pattern to add interest without overwhelming the space.
  2. Wall Decals and Stickers

    • Removable Decals: Choose from various designs, such as animals, trees, or stars. They are easy to apply and remove.
    • Growth Charts: Functional and decorative growth chart decals help you track your child’s height.
  3. Wall Murals

    • Hand-Painted Murals: A custom mural can add a magical touch if you’re artistic or can hire an artist.
    • Wallpaper Murals: Pre-designed mural wallpapers are easy to install and come in various themes, such as forests, space, or underwater scenes.
  4. Framed Art and Prints

    • Children’s Illustrations: Frame pages from books or prints of popular nursery rhymes.
    • Personalized Art: Create or buy art with your child’s name or initials.
  5. Shelving and Shadow Boxes

    • Floating Shelves: Display cute toys, books, and decorative items.
    • Shadow Boxes: Create small displays with keepsakes or themed items.
  6. 3D Wall Art

    • Animal Heads: Soft, plush animal heads can be mounted for a whimsical touch.
    • Textured Art: Look for fabric or wooden pieces to add texture and depth.
  7. Educational Elements

    • Alphabet and Numbers: Decorate with educational posters or decals.
    • Maps: A world map can be both decorative and educational.
  8. DIY Crafts

    • Bunting and Garlands: Make or buy fabric or paper garlands to hang on the walls.
    • Handprint Art: Create art using your baby’s handprints and footprints.
  9. Lighting

    • String Lights: Soft, twinkling lights can add a cozy feel.
    • Night Lights: Choose cute and themed night lights that double as decoration.
  10. Interactive Elements

    • Magnetic Boards: A magnetic chalkboard or whiteboard wall can be fun and interactive.
    • Tactile Panels: Install panels with different textures for a sensory experience.

Remember to ensure that all decorations are securely fastened and safe, avoiding anything heavy that could fall or small parts that could pose a choking hazard. Enjoy the process of creating a unique space for your little one!