Personalize Your Bedroom With Posters

Art wall 146

Bedroom is a special place for every household member. It is where you can have rest and relax from the daily routine and forget about your worries. Since it is your personal sanctuary, it needs interesting decor to make the atmosphere inviting and relaxing. There is a wide range of decors that will make the necessary transformation. While choosing the right bedroom decor, you need to consider several factors, such as room size, furniture pieces, and wall colors. 

The decors you choose can instantly change the beauty of your bedroom. This is the reason why you need to plan carefully before adding any poster. Themes may vary and are available in various designs. The most important aspect in choosing the right design is how they combine with the interior design style of the whole room. Choose the poster design that will stand out or will enhance the overall design of your bedroom. Here are some ideas that you can employ when decorating the bedroom with posters.
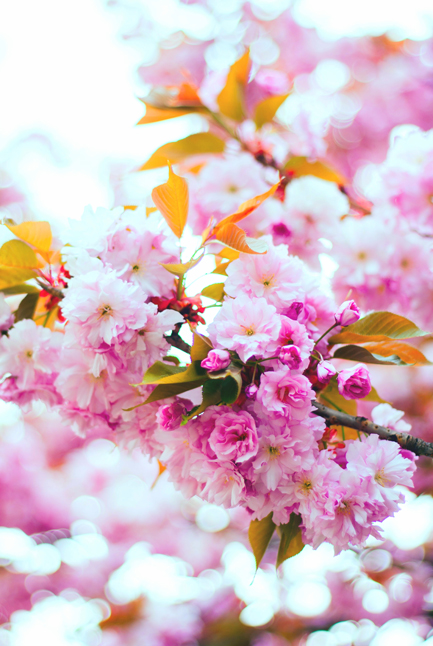
Floral prints

Floral prints are always safe to use. However, different flowers evoke different kinds of energy. Experts suggest not to have complete freedom when choosing the type of flower. There are flowers that are appropriate for the bedroom. Here are some examples:

  • The cherry blossom represents freshness and innocence and is ideal for newlywed couples. 
  • Peony Flowers are known to attract love, romance, and warmth. However, avoid this flower to couples. 
  • Roses help improve the relationships among the members of the family. 
  • Orchids symbolize love, beauty, and fertility. 
  • Narcissus is the flower that represents career and education as well as good luck and prosperity. 

Landscapes

Landscapes are fantastic poster designs that have been used in both homes and offices. If you are going to use this design in the bedroom, choose the poster the depicts good and calm weather. Images of typhoons, hurricanes, storms, and the likes bring bad vibes to the bedroom. 

Animals

The images of animals evoke positive emotions, and the urge to take care of your loved ones. Avoid posters of predators and other aggressive animals. Posters of animals with their partners are also great to display as they bring harmony and balance to your life. 
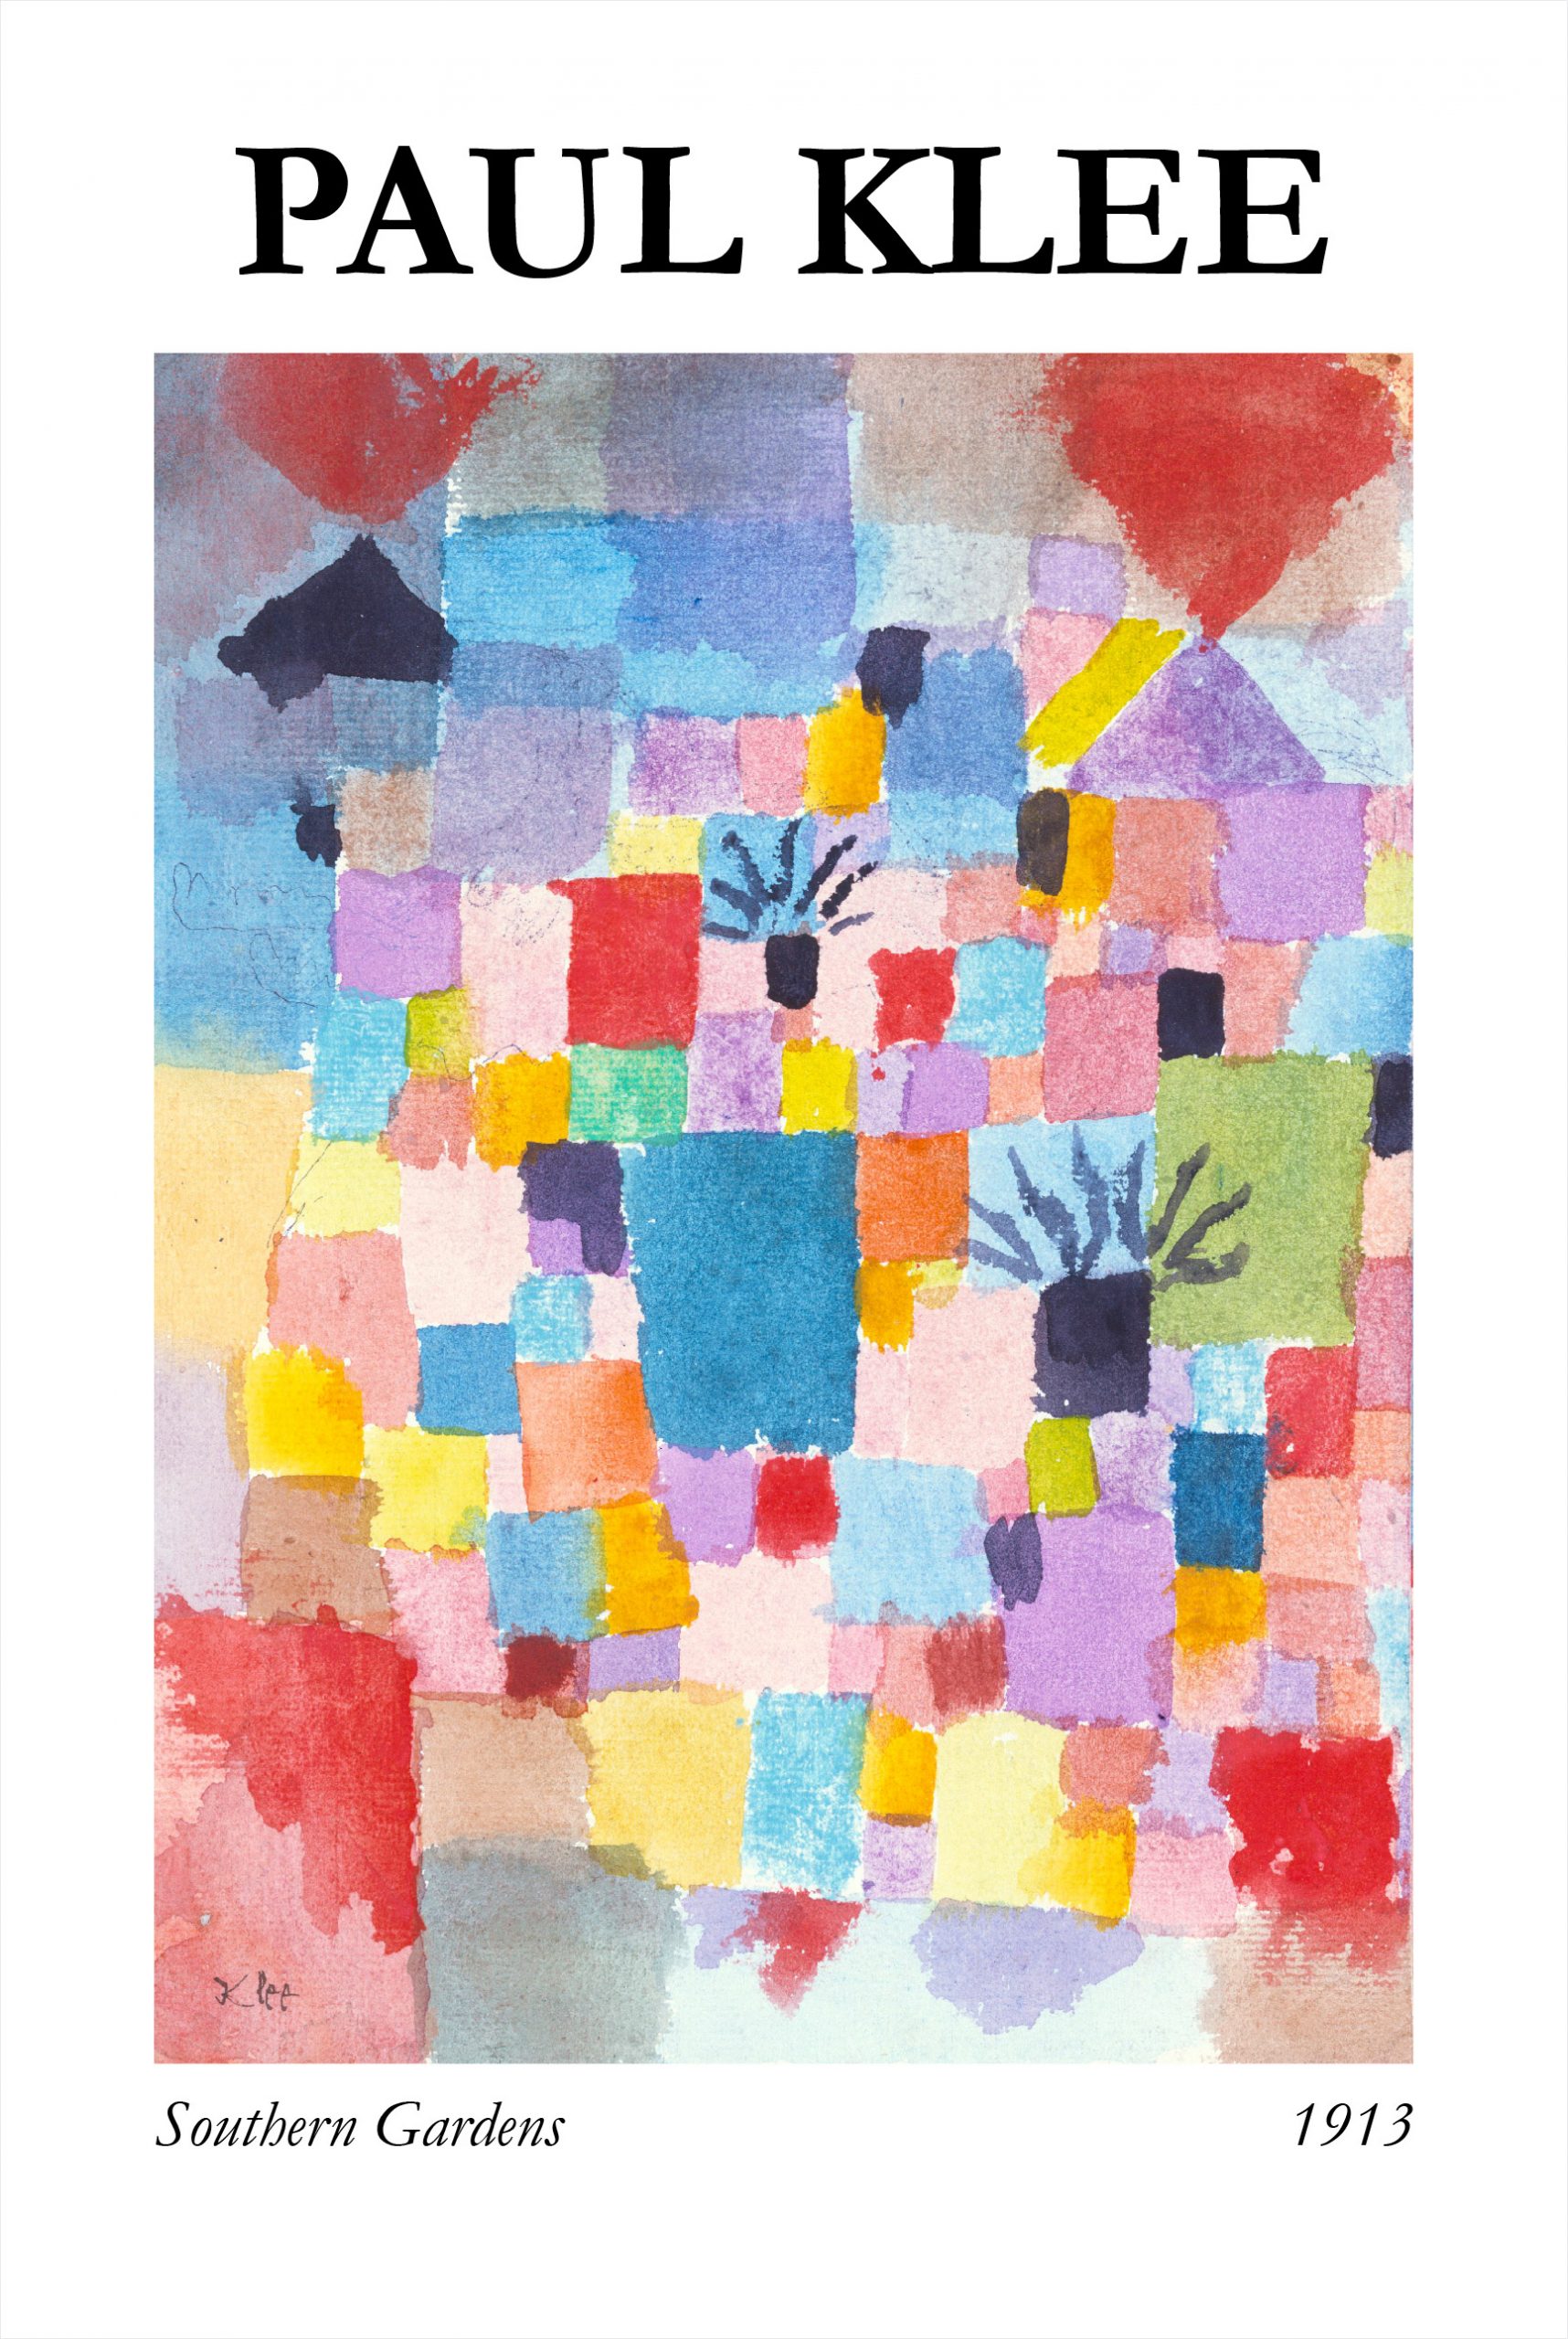
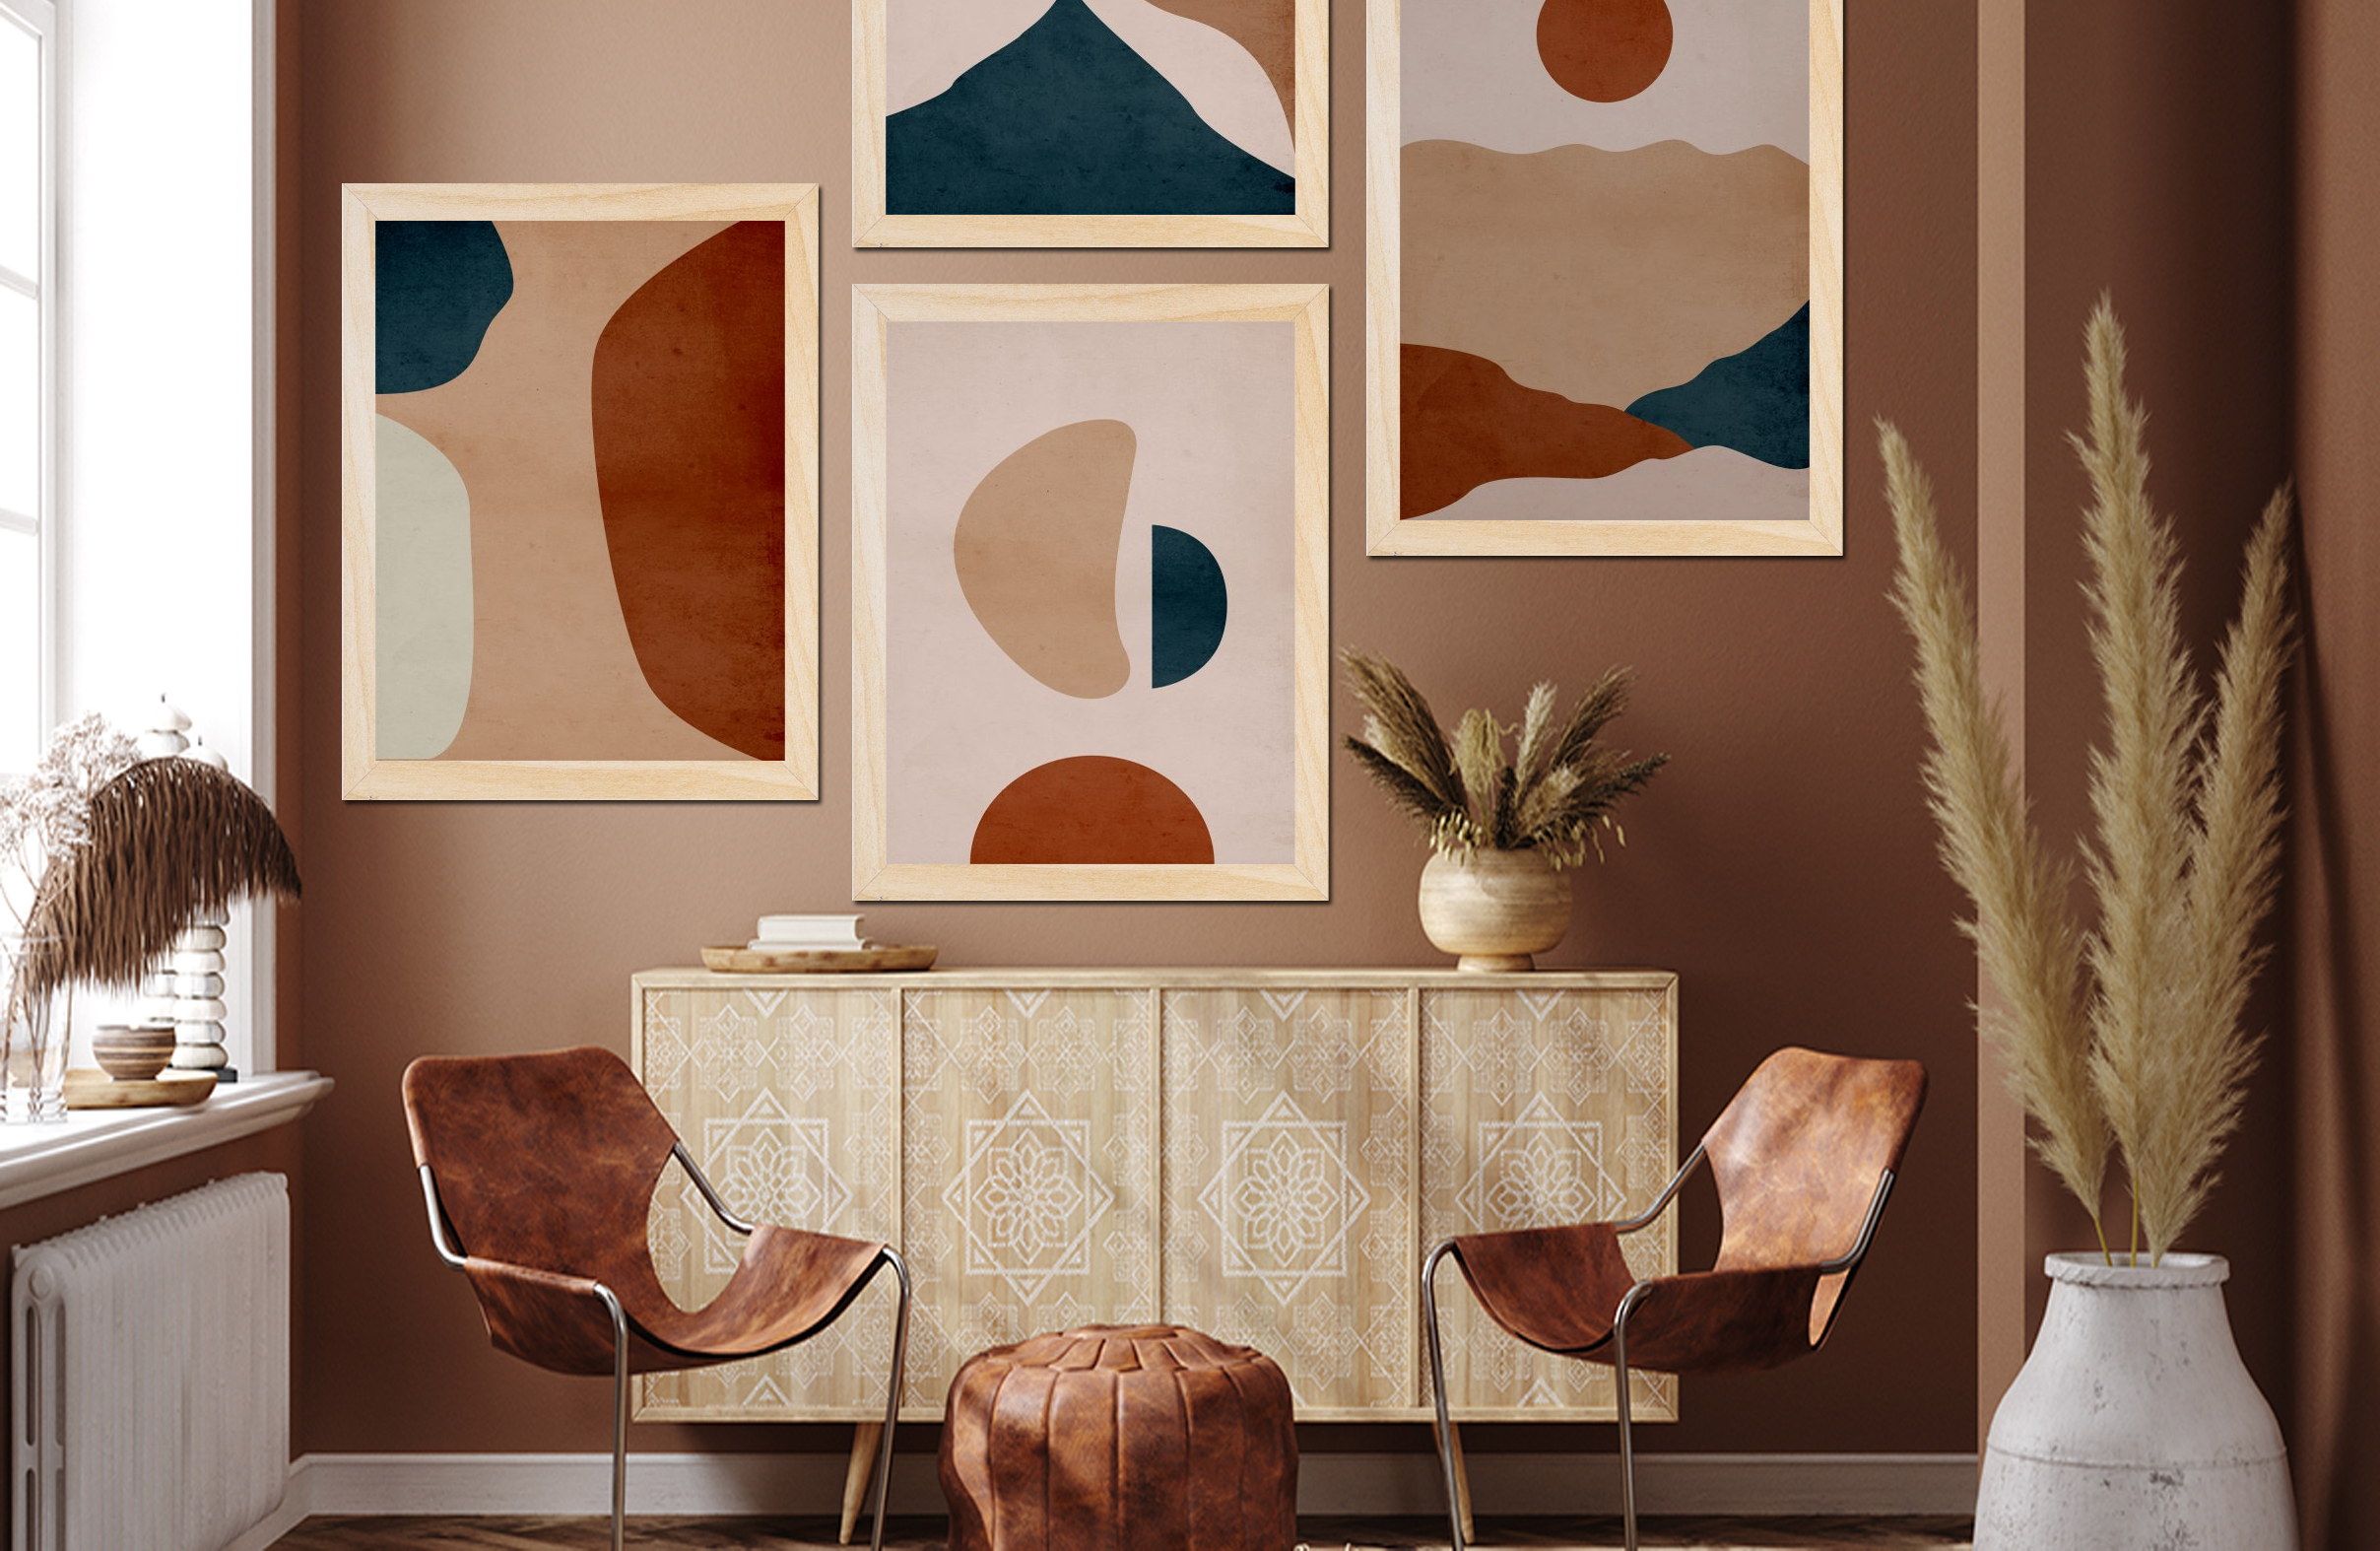
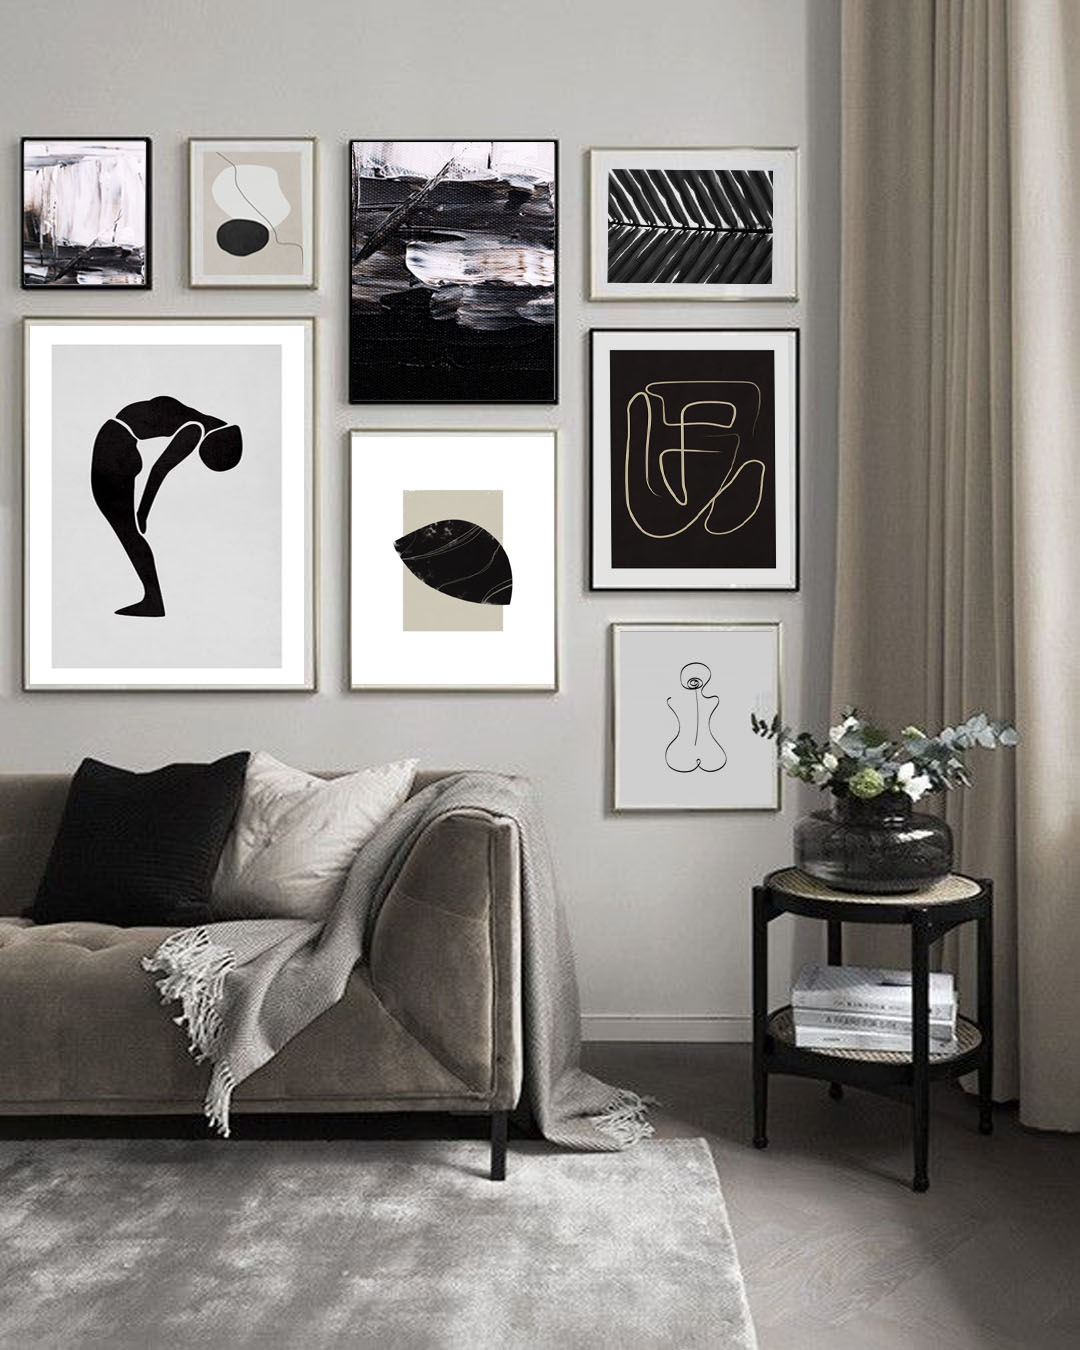
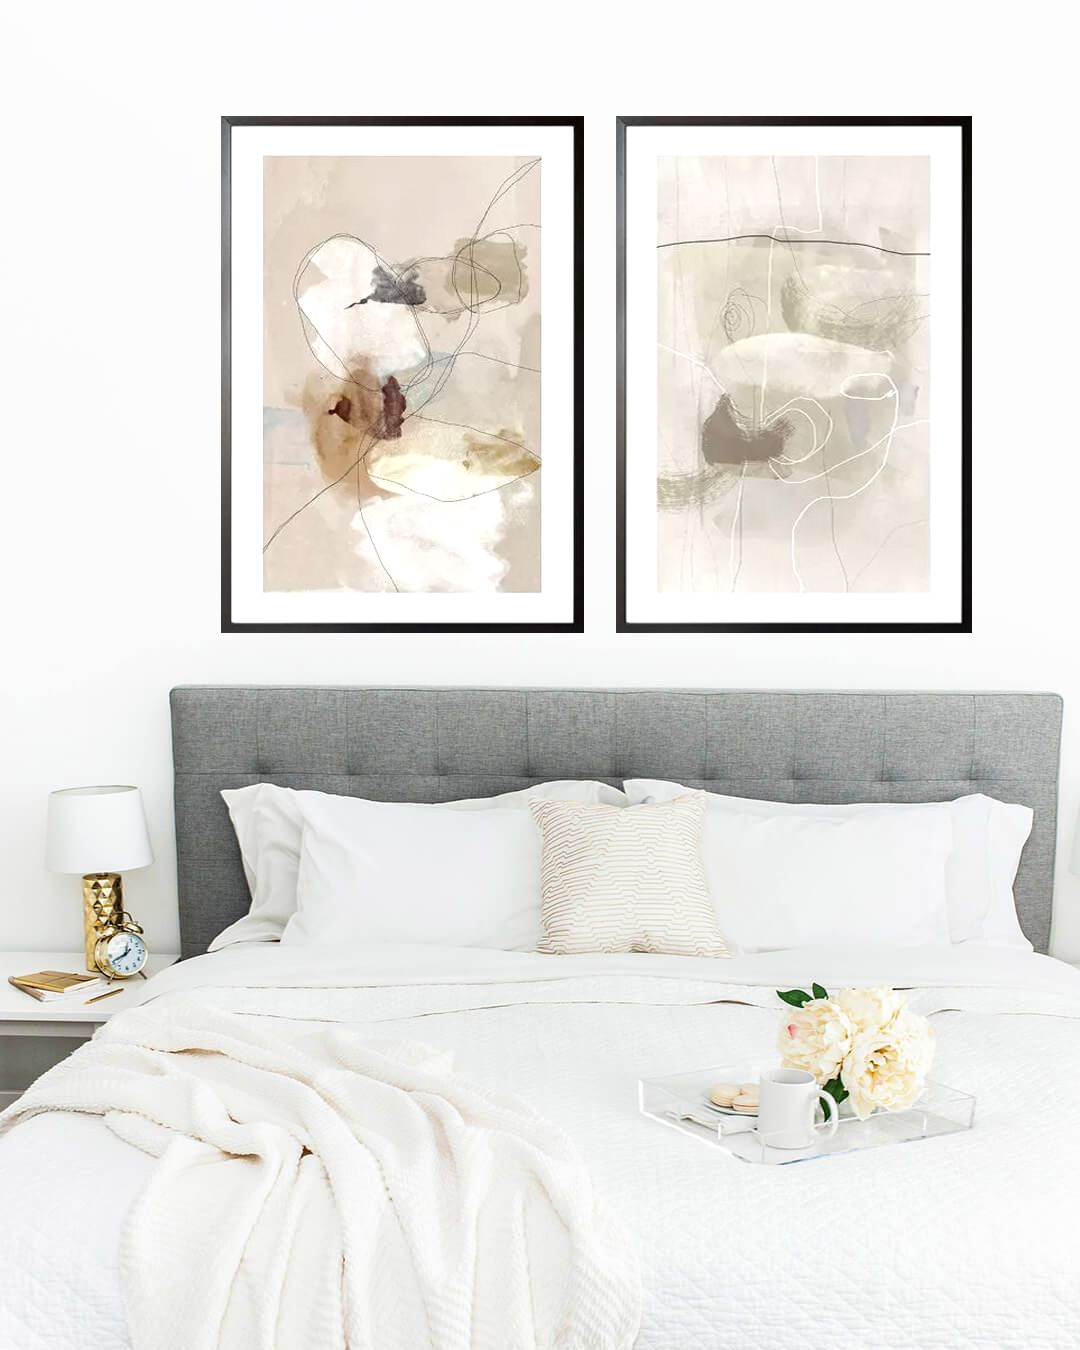
Abstract art

The good thing about abstract art is its versatility. They suit well in every room including the bedroom. Take into consideration the colors and significance of the art. We understand that sometimes it is difficult to interpret the meaning of abstract art. But that is what makes them amazing. Avoid too bright or too aggressive designs as these will not help you relax in the bedroom. 

Nature-inspired posters

If still not sure what poster to display, go with nature-inspired art. It is a universal theme and the safest design to display in any room. Just like in any theme, it is best to choose calm and placatory images. Posters with cool designs like greenery and botanical prints are proven to calm and relax the mind. On the other hand, posters of different landscapes like mountains and horizons give an impression that the room appears bigger. 

Travel posters

If you are a travel enthusiast, you can bring the adventure to your bedroom. There are many travel posters available in the market. These posters feature the different travel destinations and landmarks around the globe or the country. As such, your bedroom will have a style that will reflect your character and personality. 

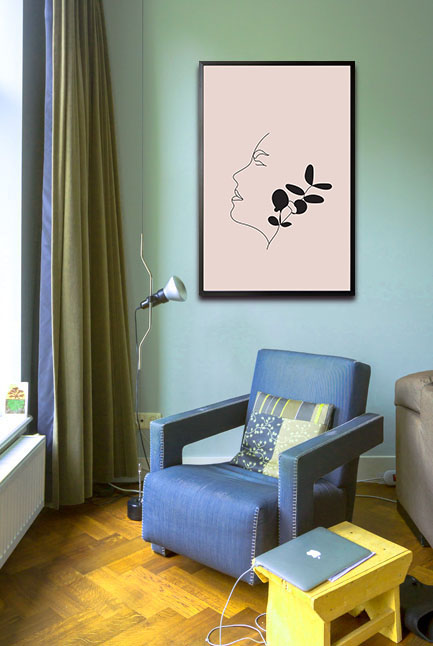
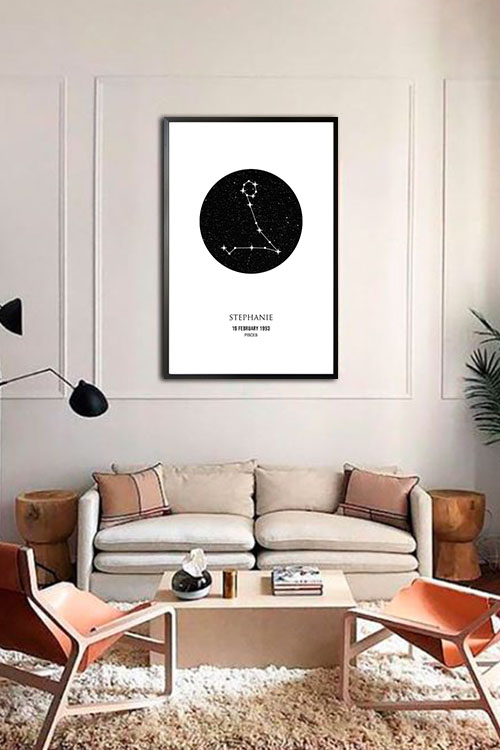
Black and white prints

Black and white posters are perfect if you want your bedroom to have that classic and retro appearance. These posters never go out of style and they likewise evoke a minimalist effect. These prints are ideal if you want your bedroom to have that elegant and sophisticated vibe. 

The Colorful World Of Paul Klee

Southern Gardens poster

Paul Klee is a talented artist who has contributed a lot to the world of art. He is also a natural draftsman who experimented with and mastered the color theory and wrote extensively about it. His lectures, Writings on Form and Design Theory, that is published in English as the Paul Klee Notebooks, are considered to be of utmost importance to modern art. Read on to learn more about the life and works of Paul Klee.

Biography

Paul Klee (1879-1940) was born in Switzerland and considered to be both a German and Swiss painter. His works were greatly influenced by different movements in art, including expressionism, cubism, and surrealism. He is a natural draftsman whose artworks have shown that he has mastered color theory. 

During his younger years, Paul Klee focused on becoming a musician, but later on decided to concentrate more on the visual arts. As a musician, he played mostly the traditional works of the 18th and 19th centuries. As a visual artist, he enjoyed practicing freedom to explore radical ideas and styles. 

During his school years, he is fond of drawing caricatures and already displaying and already displaying skill with line and volume. He also studied art at the Academy of Fine Arts in Munich wherein he excelled at drawing. After receiving his Fine Arts degree, he traveled to Italy along with his friend, Hermann Haller. While traveling, the two studied the master painters of the past centuries. 

For Paul Klee, color represented the optimism and nobility in art, and a hope for relief from the pessimistic nature he expressed in his black-and-white grotesques and satires. By 1905, he was developing some experimental techniques, including drawing with a needle on a blackened pane of glass resulting in 57 works including his Portrait of My Father (1906). He also completed a cycle of eleven zinc-plate etchings called Inventions. 

From 1931 to 1933, Klee taught at the Academy of Fine Arts in Dusseldorf. He went back to his hometown when the National Socialists declared his art “degenerate” in 1933. His later works reflected the turmoil in Europe in which they have a somber tone. Lines turned into black bars, forms became broad and generalized, scales are larger, and colors are simpler. 

Methods and Styles

Paul Klee was associated with Expressionism, Cubism, Futurism, Surrealism, and Abstraction. He usually worked alone to interpret new art trends in how own way. He developed new techniques as he worked in different media including oil paint, watercolor, ink, pastel, etching, and others. He often combined these mediums in one artwork. He also used canvas, burlap, muslin, linen, gauze, cardboard, metal foils, fabric, wallpaper, and newsprint. He also used spray paint, knife application, stamping, glazing, and impasto and mixed media such as oil with watercolor, watercolor with pen and India ink, and oil with tempera. 

With his mastery of color and toes, many of his works combine these skills. Most works have a fragile childlike quality to them and are usually on a small scale. It is also common to see geometric forms and grid format compositions along with letters, numbers, animals, and people. Some of his works are abstract that may reflect dry humor and varying moods, as well as political convictions. His works often allude to poetry, music, and dreams. His later works are distinguished by spidery hieroglyph-like symbols.  

A Brief History Of Home Decor

Art wall 129

You will be surprised that home decorating did not start recently. In fact, evidence shows that cave dwellers painted pictures on their walls. However, this came into reality in the 18th century when items became affordable for households. But before that, only the noble and the very rich can afford home decorating. This can be seen through the elegant hand-made furniture and ornate draperies. During those times, decorating the homes was a status symbol. 

Ancient Rome home decorating

The Romans were known to have advanced civilizations in which renowned architecture was built. They also enjoyed displaying their wealth through their homes and lifestyles. The houses they have and halls were decorated lavishly with murals and mosaic designs on the floor. The furniture pieces were personalized to meet their needs. It is also common to see tables and chairs have clawed feet. 

The Renaissance Design

Carpets were known to be owned by wealthy individuals because of the materials and overall design available. Since these decors were expensive, they were not placed on the floors. Instead, they were hung on walls over tables. Wealthy families also hung tapestries on their walls. The floors were covered with rushes or reeds and sprinkled with fragrant herbs. It is also common for the rich in England to use four-post beds as the curtains kept them from the cold weather. 

Elegant room appearance

During the early 18th century, there was an increase in international trade and new educational opportunities. This marked the start of consumerism. Various home decors and furniture pieces, such as wallpaper, rugs, and even pianos became affordable and available to the common people. Many rooms were painted in light colors, with floral prints on wallpapers, patterned carpets, and upholstered furniture pieces. Books were also displayed on shelves as they were still expensive during those times. 

Mass production of decors and furnishings

In the 19th century came the rise of mass production. As such, more people are able to afford home decors to make their homes beautiful. Velvet wallpapers came to popularity and these were usually seen in green and burgundy. Furniture pieces were solid but still offers comfort. They were usually made from oak or mahogany. They were likewise upholstered similar to the patterns of the wallpapers. 

Modernism

The end of World War 2 marked the rise of the Renaissance once again. That is because of home decorations. The focus was then on modernism rather than the traditional. Households in America hosted parties in which they also flaunted their shiny home appliances as part of their home decor. In addition to these, households also were filled with plastic melamine dinnerware as well as coffee tables. 

The Classes 

The home decoration was originally seen in the household of nobles and wealthy families. However, with the rise of the middle classes in the 18th century, ordinary people were able to afford simple and less ornate decors and furnishings. Homes were comprised of basic stools, tables, and benches. Families slept on mattresses that were filled with straw and thistledown. Houses focused more on function and meeting the basic needs of the dwellers instead of the aesthetics. 

Prepare Your Home For The Wedding Day

Pink flower focus poster

Already in the planning stage for your wedding? This is probably one of the most challenging parts before the big day. You will have to choose the right wedding cake, the gown, reception area, flowers, and others. With so many choices on the table, you will surely be confused about which ones to choose. However, if you are planning to have the wedding ceremony at your home, then you also have to prepare your home big time! Do not stress yourself as there are simple and inexpensive ways to prepare your house for this momentous occasion. 

Clean your house and make it stay that way

Big efforts are needed into getting your house organized and clean especially before the big day. As it draws closer, you should be able to focus on the preparation rather than cleaning up and making things look bright. Of course, many people will keep on coming in and out of your home. This will be difficult for your to keep your home clean. A robot vacuum will be a good help in removing the dust off your floors. It does not have to be that expensive. You can get good deals online. As such, cleaning the floors would be simple.

Try to rent some items instead of getting new ones

For sure, you will have some events before the wedding day. Relatives from different places will be coming in to stay in your home. Friends will come and go for visits. Your things may not be sufficient, like chairs and tables. Avoid buying new ones and look for rentals. Wine glasses, tents, decors are likewise available for rent as long as you take time in search of them. Ask your friends if they know someone to save time and effort. Another way is to check social media as you can see a lot of rentals there. 

Relieve your guests from stress

Wedding and wedding preparations are fun and exciting. They can also be highly stressful. It is important to keep everyone relaxed and maintain a comfortable ambiance to your home. If the room temperature is warm, try adding some electric fans and paper fans to keep your guests comfortable. You may also use calming scents with the use of scented candles of oils to calm your nerves before the big day. Examples of scents you can try are lavender and cedarwood. 

Prepare simple yet sumptuous meals

Food is very crucial during these times. However, this should be the last of your worries especially if you have a large number of guests. It is also vital to prepare healthy food especially for those who are on maintenance meds. You do not want your wedding to be the cause of their health problems. Plan your meals and snacks even before they arrive. You can hire some help in preparing the meals. Prepare a snack bar where they can pick their own stress busters. It is also cute to see a colorful healthy snack bar for the little ones. 

How about pets?

Pets do get stressed especially if they are not familiar with their surroundings. Look for someone who can take care of them while you are away or busy with the preparations and celebrations. You may also bring your pets along with you, especially anxious animals. 

Decorate your home

There are a lot of ways to maintain a festive ambiance in your home. Decorating the walls is one of the easiest and fastest ways to keep them cool and lovely. Posters are some of the wonderful wall decors that can be a great help when preparing your home before the big day. There are a lot of themes available. Floral prints are also perfect to make the ambiance perfect for the event. You can also personalize it with your photos with family and friends. 

Decorating A Small Room With Style

Girly face line art no. 5 poster in interior

You do not have to feel gloomy if you only have a small room. Many people think that decorating a small room is only limited to just hanging some artwork on the wall or just by simply installing wallpaper. To tell you the truth, there are endless possibilities on how to decorate your rooms with a style, even if they are small. You can even make them look and feel bigger with some ingenious tricks. Yes, it is true that adding decorations is costly, but there are ways on how to make the room pleasing without spending that much. You might even be surprised if your guests adore your room design by just using your creativity, imagination, and resourcefulness. 

How to decorate a small room

In decorating your small room with style, there are things that need to be considered. Here are the things that you need to focus on in order to have an appealing small room:

  1. Creating a focal point – focal point is the center of interest or activity in a room. In interior design, every room needs a focal point, a spot that will captivate the eye. Sometimes, having a good focal point will give you a bird’s eye view of the whole house. This can be anything that will capture the interest of anyone who looks at it. Rightly scaled artwork, nice vases or potteries on a mantle, decorative plants and flowers, sculpture, tapestries, you name it. As long as these items coincide with your interest, they will do well being the focal point of the small room.
  2. Keeping things open – what you want to prevent is having the feeling of being cramped. It may be tempting to buy a large furniture piece like a sofa, but with the limitation of having a small space, large furniture pieces in a small room may feel and appear congested. Choose furniture pieces with small stature and would not choke the room. It is good to have pieces with see-through parts. For instance, a bed with a see-through headboard and footboard. Or better yet, a bed with no footboard, such as a storage bed. This will keep the room open, making it feel larger.
  3. Boosting a small room – organize your small room to make the room more spacious. For the bedroom, you can make it dark and cozy with the use of saturated berry reds or chocolate browns. The living room can be emphasized by allowing natural light to enter the room. Natural light can be enhanced with the right window treatments or by installing light-colored wallpaper or applying light and bright-colored colors that can reflect light.
  4. Add storage areas – one thing for sure, a cluttered space is an eyesore. Remember that every part of a small room can be a potential storage area. It is true that you can just stash your things anywhere, but of course, this will cause the accumulation of clutter that will make the room cramped. The underside of the bed can be a good place to stack your boxes filled with things, not in use.
  5. Make every part of the room special – look for ways on how to make the small room look special. Add accents such as throws on the sofa, fabric with meaningful patterns in the bedroom. Lighting says a lot when decorating a small room. Choose a lovely chandelier for the living room or the bedroom or a sculptural table lamp. Use artwork to show off your personality. Choose something that is not expensive. It is recommended to blow up your favorite pictures and have them framed and hang them on the wall. Remember to use any decoration that will make you happy.
  6. Keep it high – use floor-to-ceiling curtains to make an illusion of a high ceiling. A small change can create something big. You may also use light and crisp colors for a visually higher ceiling.
  7. Keep it round – when it comes to furniture pieces, go for pieces with rounded edges, since these will take up less floor space and help widen walkways.
  8. Different style – you need not have to decorate your small room the conventional way as these may not be applicable in your room. Be creative with the layout of the furniture. For instance, you can place cabinetry proximal to the wall to save space. The bed can also be placed near the wall also to save space and place the side table next.

Budget-friendly Ways To Frame Your Posters

Many of us love posters as they can easily make any wall look fantastic. Sometimes they remind us of our teenage years when we were decorating our rooms with posters of our favorite bands. These days, there are thousands of designs and themes available. From abstract art to personalized designs, these posters can help you achieve the desired effects in your rooms. What makes it more interesting is that the addition of posters can add beauty to the poster design. If you are worried that frames will be an added cost, then there are budget-friendly ways to frame your prints. Read on to learn more about cost-efficient ways to frame posters.

Decide if you will mat your poster

We will assume that you already have your poster collection and are now planning to frame them. But before buying posters, decide first if you are going to add a mat. This is one of the factors that will determine the size of the frame you need. 

There are posters that are not of standard size. As such, they will not fit any generic-sized frame without a mat. Others would tend to cut the poster to fit the frame which is not supposed to be the case. Of course, matting would add to the cost therefore it is better if you buy a poster that will fit a generic-sized frame. 

Where to buy frames

For a more impressive result, buy your frames at craft shops. Many shops offer discounts that will help save enough cash you can use in other projects. Local stores also have different choices to offer that will best fit your prints. Some are sold in kits with included instructions on how to install them on your posters. That would be cheaper than having a professional do it for you. Although, professionals do framing the right way. 

Keep it simple

Choose frames that are simple to highlight the poster design. Extravagant-looking posters may tend to mask the beauty of the poster. Keep it simple by using a neutral-colored frame such as black or white. The white mat also highlights the art. 

Simple steps to frame a poster

Now that you already have a frame and mat, it is time to put them together. In fact, this is the easy part, and that the challenge is with the decision-making process. In Artdesign, we offer a complete set to complete your decorating experience. Here are the basic steps of framing your posters.

  1. Upon unboxing, carefully remove the frame and artwork from the box.
  2. Bend all the frame fittings.
  3. Remove the cover of the frame located at the back.
  4. Lift the acrylic glass from the frame.
  5. Pel the acrylic protective paper on both sides of the glass. Do this carefully so as not to accidentally break the glass. 
  6. Return the acrylic glass carefully to the frame. 
  7. Place the artwork on the frame and smoothen out any wrinkles. 
  8. Replace the back cover of the frame.
  9. Secure the back cover by bending all the fittings.
  10. Screw the hook on the frame and you are all set up to mount it on your wall.

Hanging your poster

There are various ways to display a framed poster. Moreover, there are some factors to consider for you to be able to hang them properly. Examples are the size and weight of the picture as well as the type of wall and hanger on the frame.

The size and weight are important factors as these will determine the right hook to use. Small art needs only a small hook, nail, or stick-on hook. Large and heavy art may require an anchor hook or more than one hook or nail.

Drywalls only need a nail. However, for heavier pictures or posters, you could use a Monkey Hook. Plaster walls, on the other hand, need a hook that is made for plaster. Another option is to use a stick-on hook or nail. Another factor to consider is the back of your frame. The hook should match the type of hanger that is attached.  

Personalizing Your Home Based On Your Zodiac Sign

Personalized Zodiac Pisces poster in interior

Still looking for the right design for your home? Searching for the right decor and design for your rooms may be quite confusing at times. Designing and decorating it may also be quite a challenge as there are many factors to consider. Think about the budget, size of your family, and the availability of resources. However, unique and interesting ideas can give your home the boost it needs. How about decorating your rooms based on your zodiac sign. This inspiration can surely help you create a perfect space that will be adored even by your guests. 

Be eclectic and eco-friendly with Aquarius

You may want to be free and be close to nature. Try to incorporate eco-friendly materials as possible. Like installing solar panels and rain-catching systems. These ideas will let you plan for better ways to help the environment. You will also love the idea of having a lot of space with extra rooms to help others. 

Serene rooms by Pisces

As a symbol of fish, you are drawn to designing your home to be calm and relaxing. Choose colors that will make your space cool and serene. Shades of blue or teal will do the trick and are surely great colors to incorporate in your rooms. Make the furniture pieces comfy as well with soft throws on the couch and plush pillows and blankets on the bed. Also, try to make the room design open as possible to allow the flow of air. 

Lively room appearance with Aries

Born under Aries have a big personality and they tend to chase after life and experience it to the fullest. Homes would most likely have bold colors and patterns, especially in the furniture pieces. Homes need to have extra rooms to create a more active space. You also need recreation rooms to fight boredom especially during these times of quarantine periods. 

Timeless and classy Taurus

The sigh of the bull wherein you enjoy beautiful things as well as a comfortable and stable environment. A large and comfortable couch is your best friend. The appearance of your kitchen will surely be the focal point of your home. As an earthy sign, add understated tones and neutral colors to bring balance to the entire house. 

Luxurious Gemini

As a social individual and with the drive to bring the whole world at your fingertips, you would do everything to make your space look large. The addition of large glass panels and wide windows would allow the entry of natural light. This will make the whole room look more open and comfortable. 

Be traditional with Cancer sign

Try designing your home to make it look vintage or traditional. As such, you will need furniture pieces and other items that will fall under these categories. Make all areas of your home comfortable and cozy at all costs. Your home will eventually be your sanctuary especially with lighter colors on the walls.

Vibrant rooms with Leo

Bright and bold colors and eye-catching furniture pieces are needed to make your space vibrant. Accessorize your walls with personal keepsakes and vibrant art. These will help you create a home that is perfect for parties and entertaining guests. 

Simple and stylish Virgo

Your home would likely feature neutral colors as they can easily blend with anything. Whether the theme of your room or decorative items, they will surely create a simple and trendy room appearance. Organize your stuff with storage items and areas as clutter will ruin everything. 

Harmonious Libra

You love to make all things balanced, especially the appearance and feel of your room. Add lighter and pastel colors as these will create an inviting space. There should also be a balance with the furniture, wall furnishings, and accent pieces as possible. Incorporate curtains, throws, and decorative mirrors to make the room look vibrant. 

Chic and stylish Scorpio

Personalize your rooms with a design that will reflect your personality. However, keeping your life private, introspective, and mysterious. Add darker colors such as furniture pieces and the colors of your walls. As a result, you will have a private and quiet home.

Creative and compact Sagittarius

Be artistic in decorating your walls such as creating your own wall gallery. The display of photos of your family and friends in frames will do the trick. So the next time you take pictures, think twice before keeping them in albums. Display them in a creative layout so that you will have a wall that will create a nostalgic vibe. 

Stylish and smart room with Capricorn

Add things to your home that you value most. You tend to lean towards a sleeker decor style with a minimalist room appearance. Keep your home organized and easily manageable. In addition to these, the addition of a large desk with sturdy shelves and drawers are needed to keep things in their rightful places. 

Personalizing Your Home With Family Photos

Art wall 133

One of the spectacular ways to personalize your home is by displaying family photos. This may be quite easy but when done in the wrong way, you will be creating an eyesore instead of a compelling focal point. So, instead of keeping the photos in an album, try to unleash your creativity by creating a wall gallery for your family photos. 

Time to organize your pictures

Sometimes, family photos are just scattered in the bedroom. Gather them all, even those that are already displayed, and group them in one area. The area can either be a gallery wall, bookshelves, or photo ledges. As such, you will be creating a fantastic focal point instead of having them scattered around the room. The chaotic appearance of the photos can now be organized with a great result. 

Choose the right picture frames

The appearance of the focal point or photo gallery greatly depends on how well they are framed and displayed. Small frames do not look that appealing. Replace them with larger ones and it is better to use the same frame for all family photos. This will be of great help to highlight the photos displayed on the walls. Large mats will likewise highlight the photos.

A feature wall instead of scattered photos

Avoid having more than two areas in a room with daily photos displayed. For instance, if you already have a feature wall with a gallery of family photos, you can still add another area for the photos to be displayed. Examples are the nightstand or console table. Choose the right area in the room to display family photos. Do not overpower the whole room appearance with too many areas displayed with photos.

Family photos in grids

A collection of family photos in a grid of frames with mats will top it all. This arrangement is perfect for big walls. It is also important to choose the right frame to highlight the display. Extra-large mats can also highlight the photos, making them instantly noticeable once a guest enters your home. 

A kitchen gallery

The display of family photos is not confined in the living room alone. Be creative and unique by creating a wall gallery in the kitchen. Pick a spot where the photos can give your wall a fantastic appearance making the room look more perfect. 

Decorating the hallway with a photo gallery

The hallway may have multiple purposes. Decorating the wall with a photo gallery will make the necessary transformation. Impress your friends by creating a gallery of special memories. With the use of warm wood frames and clean white mats, you will have a wall that will look timeless, especially if the photos are in black and white

Fun-filled dining room with wall gallery

What’s the best way to entertain your guests while dining? Of course a wall with framed photos. This wall design will not only add life to the room. It will also serve as a conversation starter as the photos can give a nostalgic vibe. The layout can be anything as long as they do not overwhelm the room. 

Blah Blah blah poster

Blah Blah blah poster

Time to add colors to your rooms with trendy and stylish art from Artdesign. This print is a great addition to your walls as it not only create a vibrant room. It will also add a fun and exciting room environment. Personalize your poster by sending your own quotes or sayings. Try it now!

Framing A Poster

Artdesign frames

The display of posters is one of the fun and exciting ways to express ourselves, add a personal style to our rooms, and bring to life any room in our homes. Gone are the days that we simply display the art or any photos on the walls. Sometimes we even use corkboards to pin these memorabilia. These days, the use of frames does not only protect your art, posters, or photos. They can also add beauty to the wall decor that will level up the overall appearance of your walls. 

Local framing store

The quickest and easiest way to frame a poster is to bring it to a local framing store. However, this may be a little expensive and greatly depends on the type and size of the frame. The only disadvantage is that these stores may have a limited selection of suitable frames to choose from. Some stores may also offer you frames that are of not good quality and may cause problems in the future. 

Frame it yourself

If you are worried that you may commit a mistake in framing your posters, there are different references on how to do it correctly. The internet is one of the best sources that we have these days and practically everything can be found on various websites. 

Choosing the right frame is quite a challenge at first. But come to think of it, there are simple ways to determine the most suitable frame for your needs. You need to consider two aspects of your poster. Is the poster black and white or colored? You also need to consider the dimension of the poster. If the poster is black and white, a neutral frame is highly recommended to highlight the image. If the poster is in vibrant colors, choose a frame with a color that is also featured in the poster. 

How to frame a poster

  1. To use or not to use a mat. The mat can add beauty to your posters as it provides an extra border, providing a space between the poster and the frame. Mats can also adjust the size of the poster.
  2. The right frame to use. There are different types of frames to use. The materials also vary from plastic to high-quality metal or wood. These frames can add beauty to your poster and likewise protect them especially those that are considered to be collector’s editions. 
  3. Clean the glass or plexiglass.
  4. Attach the poster to an adhesive foam board.
  5. Slide the glass back into its place in the frame.
  6. Fit the mat into the frame.
  7. Gently slide the poster or foam board into the frame behind the mat.
  8. If there is a need for a poster backing, then add it to the assembly. This protects the art against dust and dents. 
  9. Attach the hanging mechanism. 

The perfect frame for your poster

Finding the right frame for your poster and framing it is not that difficult as many people think. Many shops sell posters in the form of a kit. There are instructions included to guide you in properly adding the frame. In Artdesign, we have simple yet appealing frames that will add beauty to any poster design that you choose. Choose the right frame and beautify your walls.